How to create a VPN connection between two VPCs on Alibaba Cloud
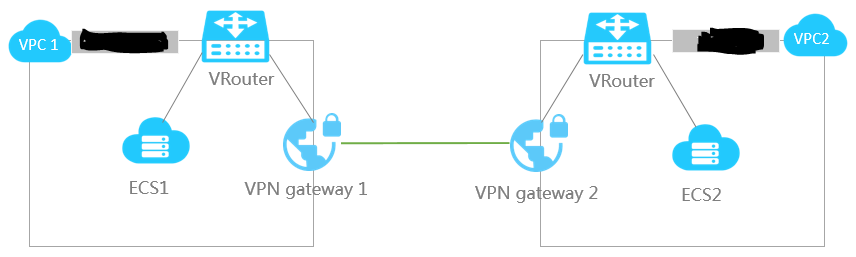
Here’s my Scenario,
VPC name
|
CIDR block
|
VPC ID
|
Cloud products
|
VPN gateway
|
IP address
|
Customer gateway
|
VPC1 - Singapore
|
192.168.0.0/16
|
vpc-xxxxl8
|
ECS1- ping2germany
|
vpn-t4newx5ozbu4qv3jvjgbl
|
47.74.237.210
|
connect2germany
|
VPC2 - Germany
|
10.0.0.0/8
|
vpc-xxxnkf
|
ECS2 - ping2singapore
|
vpn-gw8u6ia3djbzkpcnxrs7h
|
47.254.132.106
|
connect2singapore
|
Login to you console and navigate to Network > Virtual Private Cloud. Then Click on Activate.

Create VPC.
VPC 1 in Singapore
VPC 2 in Germany
The one listed in the below image is a system created VPC.

Check the table at the top to see the CIDR of both the VPCs.
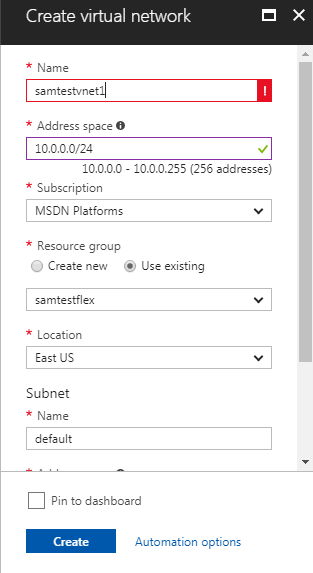
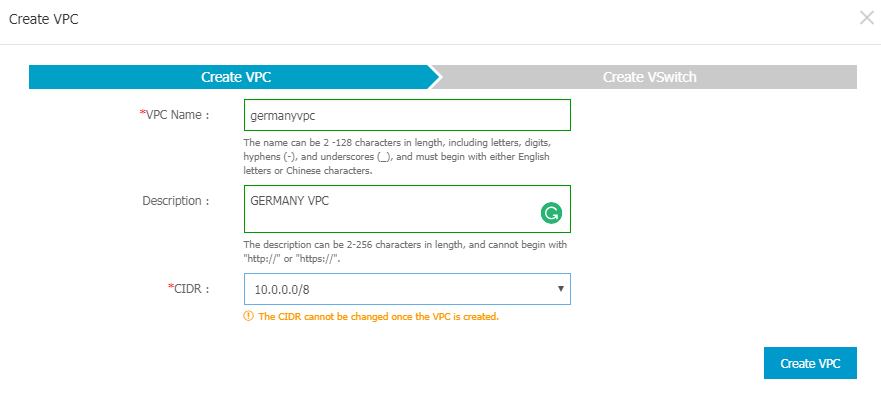
Fill the Basic information for Creating the VPC.
VPC name
Description (optional)
CIDR


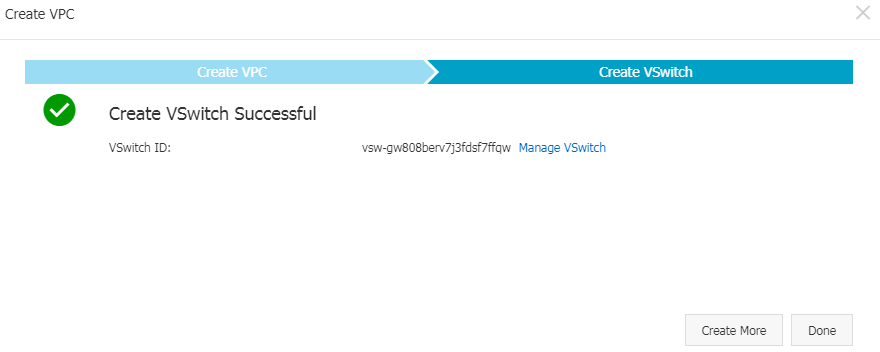
Once you create VPC, next step is to create vSwtich. You can create multiple vSwitch back to back.
Be sure about the CIDR for your VPC and vSwtiches that it does not clash with the another VPC with we will connect to over VPN.

Create VPC 2 for Germany region as we did for Singapore.

Create vSwitch in VPC 2(Germany) as we did in VPC 1 (Singapore)

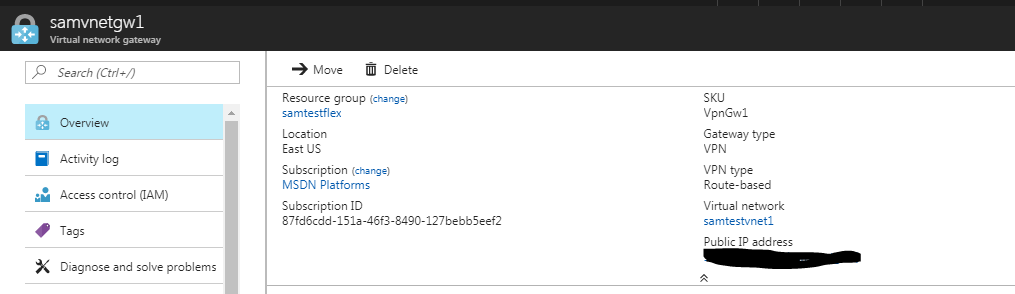
Create VPN gateways
Be on the VPC page and Navigate to VPN > VPN Gateway.
Click on Create VPN Gateway from top right corner.

Create the VPN Gateway with the below details.
Configuration
|
Description
|
Region
|
Select the region where the VPN gateway is created.
|
VPC
|
Select a VPC to create the VPN gateway for.
|
Peak Bandwidth
|
Select a peak bandwidth. Two specifications are available: 10 MB and 100 MB.
|
Billing Method
|
You are charged based on the actual traffic usage.
|
Quantity
|
Select the number of VPN gateways to be created.
|
Billing Cycle
|
VPN gateways are billed on an hourly basis.
|
Repeat the previous steps to create another VPN gateway for VPC2.

You will get one public IP’s for each VPN gateway.
The relationship between the VPCs and VPN gateways is shown in the table at the top.
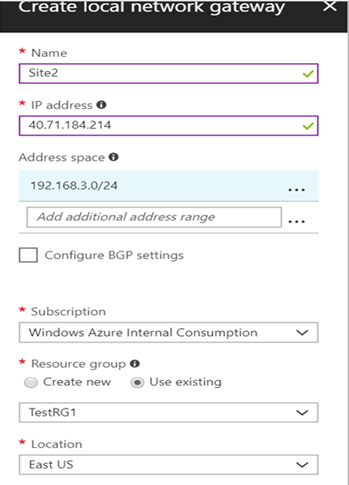
Create customer gateways
Log on to the VPC console, navigate to VPN > Customer Gateway.
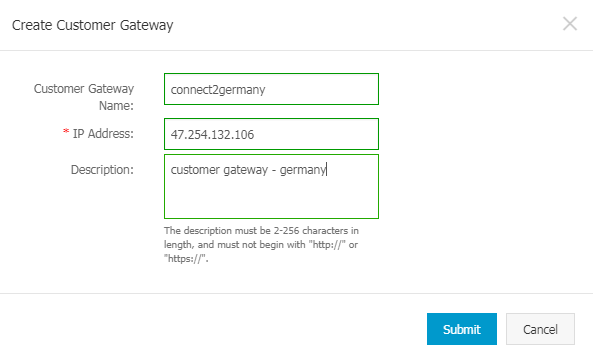
Click Create Customer Gateway.
Click Create Customer Gateway.
Enter the public IP address assigned to the VPN gateway of the opposite VPC.
Repeat the previous steps to create another customer gateway for the other VPC.

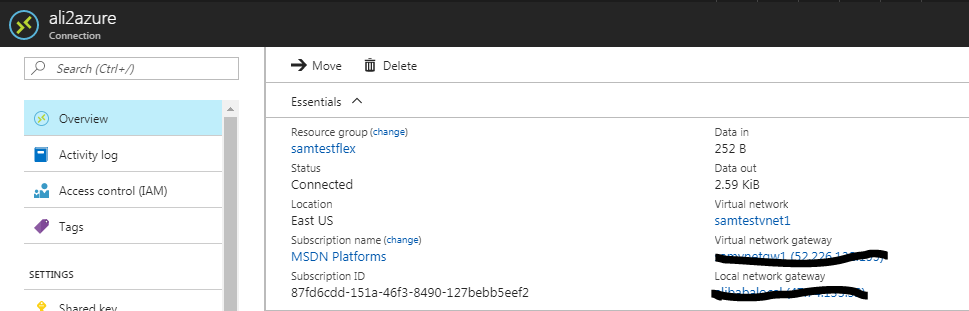
Create VPN connections
Log on to the VPC console, navigate to VPN > VPN Connection.
Click Create VPN connection.
Click Create VPN connection.

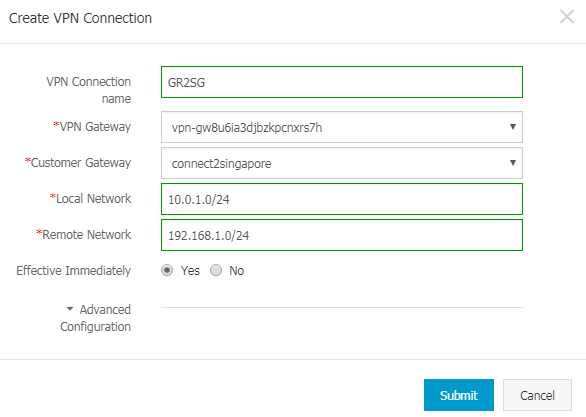
In the Create VPN Connection dialog box, configure the following:
I am creating this VPN connection from Germany, so the customer Gateway should be of Singapore.
Local Network is the CIDR block of the selected VPC. (Germany)
Remote Network is the CIDR block of the peer VPC to be connected. (Singapore)
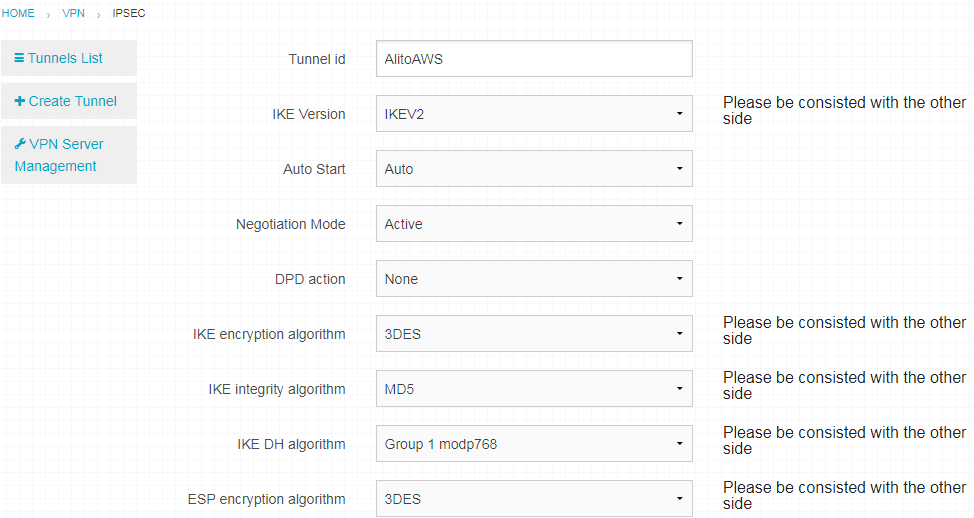
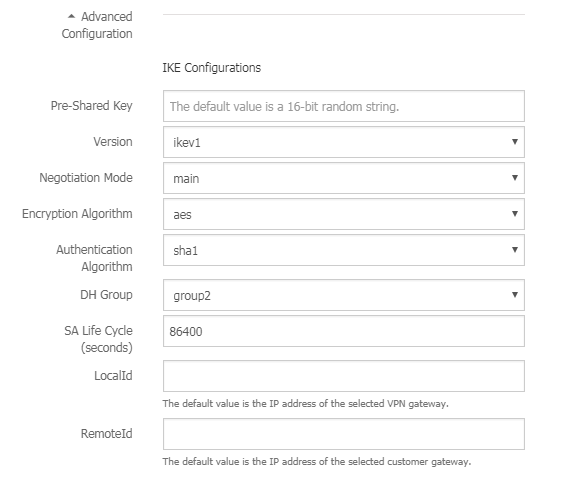
Click on Advanced Configurations to Change the IPsec and IKE configurations as required.
Make sure the Pre-Shared key is same on both the side.
Repeat the above step in the VPC 2 as well (singapore). Once the information is filled and submit. You can see teh connection status will change to succeeded.

Configure routing
Log on to the VPC console,Navigate VPC > click the ID of the target VPC > VRouter
and then click Add Route Entry.

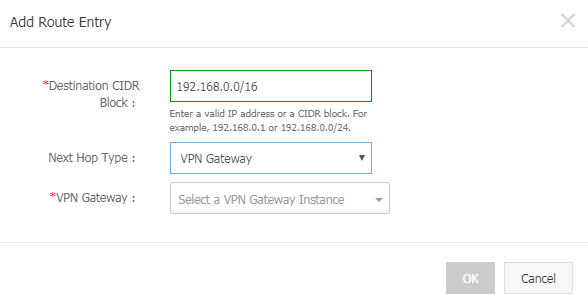
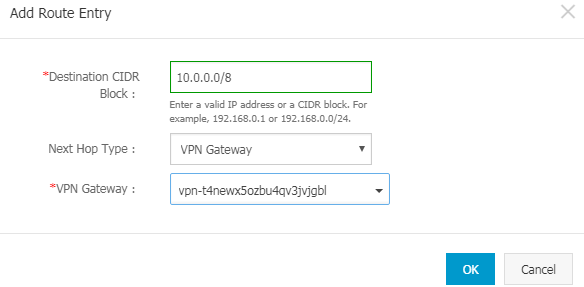
In the Add Route Entry dialog box,
Enter the CIDR block of the VPC in the other region.
Select VPN Gateway as the next hop and Select the VPN gateway for the current VPC.
Select VPN Gateway as the next hop and Select the VPN gateway for the current VPC.

Repeat the above step for 2nd VPC.
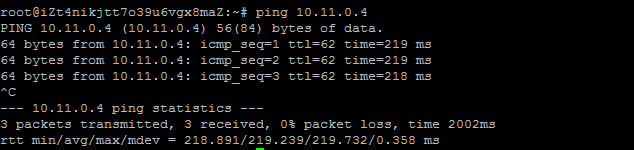
Once the network configuration is done. Create one ECS instance on each region to test the connectivity. Make sure it is in proper VPC and vSwitch.


Here’s my test from one ECS on Singapore region to the ECS on Germany resion.